Monday, June 8, 2009

One of my favorite breads - Rustic Garlic Herb Bread


Homemade bread is something I love to make because I can do chores or homework while the bread rises. I do not have a bread machine, but my KitchenAid is absolutely my best friend when it comes to baking bread. I do not have adequate counter space in my tiny apartment kitchen to knead bread, luckily my KitchenAid does that for me.

This bread is fairly easy as far as yeast breads go and does not need any adjustments for high altitude.

The Recipe - Rustic Garlic Herb Bread
4 - 4.5 cups bread flour (all-purpose will do in a pinch)
1.5 tsp active dry yeast
1.5 cups room-temp water + 2 tbs warm (NOT HOT) water
2 cloves garlic, finely minced
2 tbs fresh dill, finely chopped
2 tsp salt
Olive Oil
Cornmeal
Coarse Salt

Makes 2 loaves

variations: substitute just about any herb you can think of; omit garlic; add sun-dried tomatoes or olives (add 1-2 tbs water for these additions)

Combine 2 tbs warm water with yeast. Allow to proof for at least 5 minutes. Combine flour & yeast/water in mixing bowl. Add remaining water, garlic, dill, and salt and mix with dough hook for at least 3 minutes. Continue kneading on speed 2 for 6-10 minutes. I always mix mine on the long side because you cannot over-knead yeast breads (not so for quickbreads!) The texture should be stiff, smooth, and elastic. Should be stretchy if you pull on the dough.

Form dough into ball and put into bowl that has been oiled with olive oil (about 1 - 2 tbs olive oil). Roll ball around to fully coat with olive oil. Place in warm area that is free of any draft, cover with towel and allow to rise for one hour. After an hour, fold the dough inside itself, releasing the gas, cover and rise again for 45 minutes. After second rise, punch dough down and divide into two equal pieces.

Form the two equal pieces into smooth round balls, leaving the seam at the bottom, and place seam-side down on a floured surface. Cover with towel and allow to relax for 20 minutes.


Scatter cornmeal over a large baking sheet (or two small sheets). Stretch dough into a rectangle (6" X 8"), making sure to keep an even thickness all the way around. Transfer to baking sheets. Brush surface lightly with water.

Allow dough to rise a third time, covered, until the dough springs back slowly to the touch (30-45 minutes).


Preheat oven to 425. Score dough with very sharp knife or razor blade. You can be creative with this, I score mine in different patterns depending on my mood and how I want them to look. Brush the dough with olive oil, taking special notice around the seams and the edges. Once covered in olive oil, sprinkle coarse salt over top of loaf.


Place in preheated oven and bake for 25-30 minutes, until golden brown. Cool completely on wire rack. You can brush it with an additional coat of olive oil at this time, I usually brush it along the seams. Cut with serrated knife and eat. Totally delish!!

Frozen Gnocchi Update

Today for lunch I decided to try out the frozen gnocchi.

When I pulled out the gnocchi it had a few ice crystals, but it was not freezer burnt. If I had a vacuum sealer I would use that in the future to prevent the air that inevitably gets trapped in the gallon-sized Ziploc freezer bag. Since I do not, I will just be extra cautious about removing as much air from the bag as possible.

I boiled the salted water and added the gnocchi (still frozen). It took about 2-3 minutes for the gnocchi to rise to the top of the water. The result? Still delicious! There was really no noticeable difference. I am pleased to know this because I may double the original recipe in the future to cut down the overall time involved with making two separate batches. Hooray for a successful freeze!

Tuesday, June 2, 2009

Recipe Upgrade: Cauliflower Soup


Cauliflower Soup: Like potato soup, but BETTER. My boyfriend is not a huge fan of cauliflower and absolutely loves this.

A friend gave me a recipe for a reduced calorie but creamy cauliflower soup. Looking at the recipe, I thought it sounded like a good basis, and definitely a healthy alternative (coming in at 110 calories and 6 g fat with 6 g fiber) it just did not sound delicious. I am of the belief that if your entire dinner is going to be soup, you might as well make it yummy (ahem, fattening). Of course, you may be of a different opinion, so I am including the original recipe, courtesy of my friend Katie.

ORIGINAL RECIPE

1 (2-pound) head cauliflower
1 tablespoon extra virgin olive oil
1 small onion, thinly sliced
1/3 teaspoon salt
4 cups water
1/4 cup reduced-fat sour cream
1/2 teaspoon ground nutmeg
Salt and freshly ground black pepper


Cut cauliflower into florets and slice stems into 1/3-inch pieces. Heat oil in a heavy-bottomed saucepan over medium heat. Add onion and cook until softened, stirring occasionally, about 5 minutes. Add cauliflower and 1/2 teaspoon salt; cover and cook for 5 minutes. Add water, cover, bring to a simmer, and cook until cauliflower is tender, about 15 minutes.


Puree vegetables and cooking liquid in a blender or food processor until smooth, or use a hand blender. Return to saucepan and whisk in sour cream and nutmeg. Season with salt and pepper to taste and serve.


UPGRADED RECIPE

1 Head Cauliflower
4 strips thin-sliced bacon, sliced into one-inch pieces
2 small or one large onion (I like yellow onions), sliced very thin
2-3 garlic cloves, minced
1/4 c flour
4-6 c chicken or turkey stock
about 7-10 red potatoes, cut in half (leave peels on)
3/4 c heavy cream
salt & pepper to taste

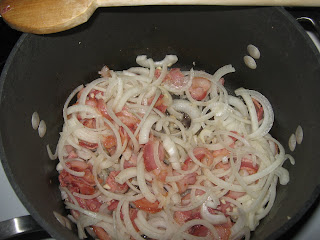
First, section out the cauliflower and steam for about 15 minutes. Meanwhile, render the bacon in a large stockpot under medium-low heat. When the bacon is halfway cooked, add the onion and garlic. Continue cooking for 10 minutes, or until onions are translucent.


Add the 1/4 c flour to the bacon-onion mixture to make a roux.


Once the flour is fully incorporated (should be fairly quick, within a few seconds), add 1 c of the chicken stock and stir thoroughly.


Add steamed cauliflower and potato halves to mixture. Pour remaining stock over vegetables (does not have to completely cover them, just most of the way). They will shrink.


Bring to a boil over medium heat, then set heat to low and continue simmering for 30-45 minutes, making sure that potatoes are cooked through. Remove from heat. Add salt & pepper (I am pretty generous with both, it is a large soup). Use immersion blender to thoroughly pulverize the entire pot.


Once it is completely blended - no lumps at all - add cream. Use hand mixer to incorporate, but only until just mixed. You can even just stir it in with a wooden spoon.


Serve immediately. I usually make a little extra bacon while the soup is cooking for a garnish, and it is absolutely delicious with a little sprinkling of cheese!


This recipe serves at least 6 people, and you'll definitely have leftovers...unless you have giant bowls.

Monday, June 1, 2009

Gnocchi - An Experiment

I love gnocchi, and I always thought it looked a little...well...scary to make. So I did a bunch of research and settled on combining a few different recipes that I found. They are all pretty much the same ratios of ingredients. I really like the techniques on 101 Cookbooks, which has an extremely helpful tutorial. I did make a few changes, adding salt and finely crushed telicherry pepper to the dough, as well as using a potato ricer to deconstruct my potatoes. I used medium-sized russets and cut them in half prior to boiling.

It turns out that I may have used more than 2 lbs of potatoes, as called for in the recipe, because my kitchen scale decided to run out of juice. I had to add a bit more flour, about 1/3 cup extra, but they turned out just fine.

The Recipe

2 lbs baking potatoes

1 cup flour

1 egg, beaten

salt

finely ground pepper

(note: I added a little treat to half the dough, see below)

First, you'll want to thoroughly wash your potatoes, cut in half and put them in a large pot with salted cold water. Bring to a boil and continue boiling until they are thoroughly cooked. Once cooked, push through potato ricer OR remove skins and mash up by fork.

Allow the potatoes to cool for about 15-20 minutes. Stir in egg and sifted flour.

I found that it was much easier to mix this all together by hand instead of using a spoon. Do not use a heavy hand while mixing, though, because you don't want these to end up sticky. My dough looked something like this:

Once your dough is ready, take a handful and roll it out on a floured surface. My roll was about 1 inch thick. Once you have rolled out the dough, cut into small pieces. Mine started out at about 1 inch, but I made them smaller as I went on. After they are cut into pieces, roll them on the tines of a fork to make them cute. In the research that I did for this recipe, I did find that many people just roll them into a half-football shape. This is perfectly acceptable and is probably easier than the fork-tine method.


After I made about 100 plain gnocchi (yes, this recipe makes a LOT of gnocchi!) I decided that I wanted to mix things up a bit. So, I went to my trusty Aerogarden and harvested some basil. I then chopped it up and mixed it in the dough. These were really good and I will definitely be experimenting in the future with other flavors.

I rolled them out in the same manner. Once I finished, I had *plenty* of gnocchi, so I packed up some to freeze. I will let you know later how those turn out.

To cook these gnocchi, I used the same water that I boiled the potatoes in, brought to a rapid boil, dropped them in, and removed as soon as they floated to the top. I then put them in a colander to drain while I heated up some butter in a skillet. This idea was from Giada de Laurentis' book Everyday Pasta for making crispy gnocchi. I don't really know if I will do this method again because, quite frankly, they were too rich, and they kind of stuck to the pan. I then drizzled homemade pesto all over the entire batch and let me just tell you...these were *really* good. Perfectly pillowy in my mouth, great flavor, great texture. The only thing I will do differently next time is abandon the pan-frying method and just put the pesto on them as soon as they are done.

Final Verdict: Totally time consuming (took about 3 hours start to finish) but DEFINITELY worth it. The final cost for about 3 lbs of gnocchi came to roughly $1, which is a huge value over the ones I buy at a delightful little pastaria in Boulder at $5.99/lb. And they taste better.

Valuable Lesson Learned: do NOT...I repeat...do NOT pile raw gnocchi on paper plates. They stick. Use baking sheets instead. I think this might have been my fault, because they shouldn't have been sticky anyway, but I used too many potatoes. To freeze I arranged them in a single layer on a paper plate, separating each layer with parchment paper, and put them in a gallon-sized freezer bag.

High Altitude Adjustment: none.

The Girl Behind the KitchenAid

Just what the world needs: another cooking blog. I am starting this with the sheer purpose of organizing my recipes and sharing them with friends.

If you are stumbling upon this page, here are some basics:

My name is Tracy and I am almost no longer a twenty-something. I am from South Texas and you will see a bit of a Tex-Mex, Southern, and Coastal influence in a lot of my cooking. I currently live in Denver, CO and I am learning to deal with high altitude baking. I will include high altitude adjustments on all recipes that require them. I went to culinary school for one year before I figured out that a life resigned to a restaurant was not exactly my happy place. Cooking is my passion and my number one hobby. I cook at least once a day. I am very old-fashioned in a lot of my methods - I do not like shortcuts, I like recipes that take 3 hours to complete, and I will never use an electric stove. I am budget conscious, but I do believe in using high-quality ingredients. I will try to include shortcut methods in all of my dishes, because many of them can be altered. I will also try to include lighten-up ingredients in high fat recipes. My favorite cuisine is Italian, and my specialties are soups, breads and desserts. I am BIG on pictures with recipes, so you will see plenty of pictures with every new dish.

Most of this blog will be cooking adventures and misadventures, as well as a few product reviews and general cooking information here and there. My other main hobby is gardening, so you may see a post or two about my garden sprinkled in.

If you have a dish that you would like me to try, feel free to send it my way. I love requests and new challenges.

I hope you enjoy this blog, and if you have any comments or suggestions, please pipe up!